

If you have been a part of My Daily Bread Body and Soul very long you will know that I adore making bread. I like eating it but even more, I like making it! I was in Japan a few years ago on vacation and I don’t remember bread ever being served. And what about the Japanese restaurants where I’ve never eaten bread?
Recently I saw a post for Milk Bread from The Brown Eyed Baker. When I saw her pictures I was drooling. When I read the list of ingredients I was puzzled. Flour, water, cream, honey, yeast, eggs – this all sounds familiar.
The more I read about her milk bread the more I came to know it is actually fashioned after Japanese Milk Bread. How is it I didn’t know about Japanese Milk Bread?
I read a New York Times article that said when panko, Japanese bread crumbs, first appeared here, American cooks fell in love with the crispy texture. And I do love panko breadcrumbs! But how could breadcrumbs arrive from Japan, a land without bread?
Ta-da! The answer is here, in the lofty, feathery white bread that is a staple at bakeries throughout Asia. Panko is often made from the heels of the loaf, called the “ears” in Japanese. Milk bread was developed in Japan in the 20th century, using tangzhong, a warm flour-and-water paste traditionally used in China to make buns with a soft, springy texture and tiny air bubbles.
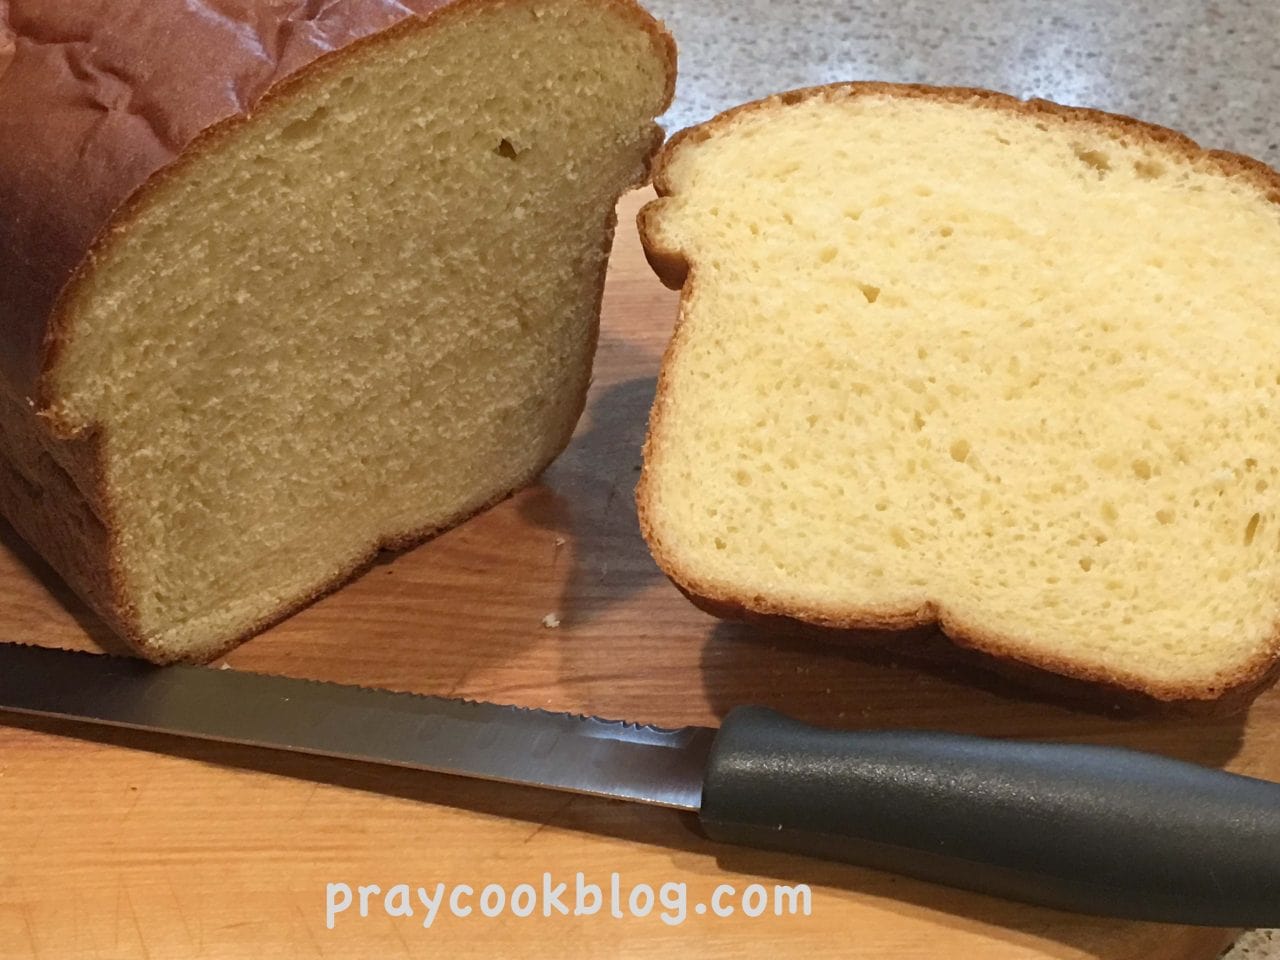
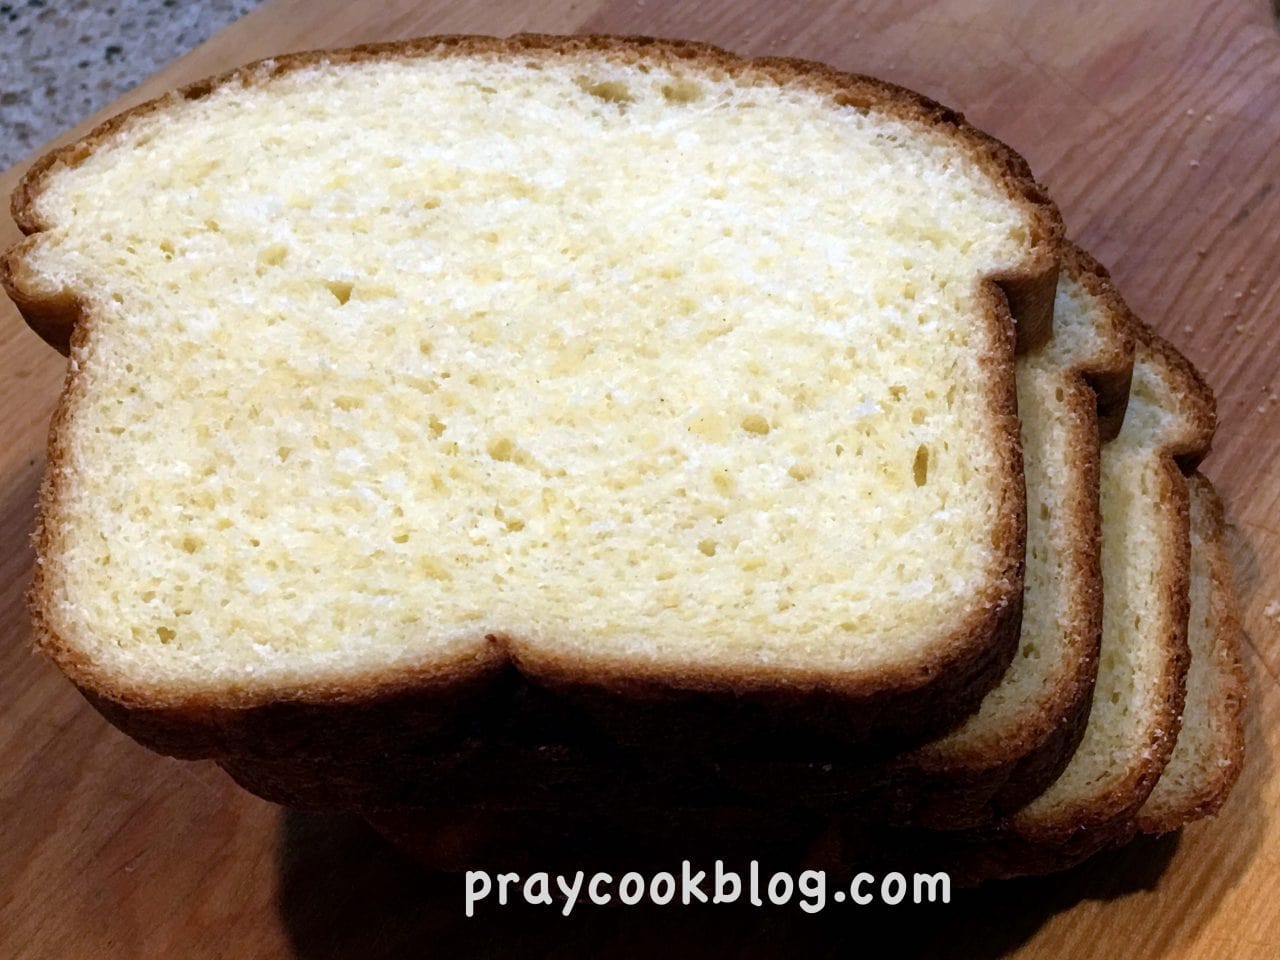
Using a recipe from Julia Moskin, I found Japanese milk bread with a soft crumb and buttery taste is easy to make at home, using grocery store ingredients. Once the tanzhong is cooked and cooled — about 10 minutes on the stove — you have a leavened dough that is soft and pliable with a fragrance that beckons everyone to the kitchen.
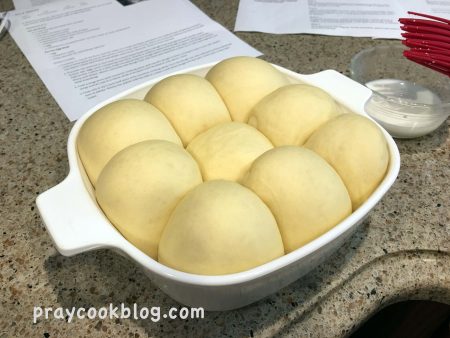
This loveliest of dough can be shaped into rolls, round loaves, pull-aparts, or an actual loaf of bread!
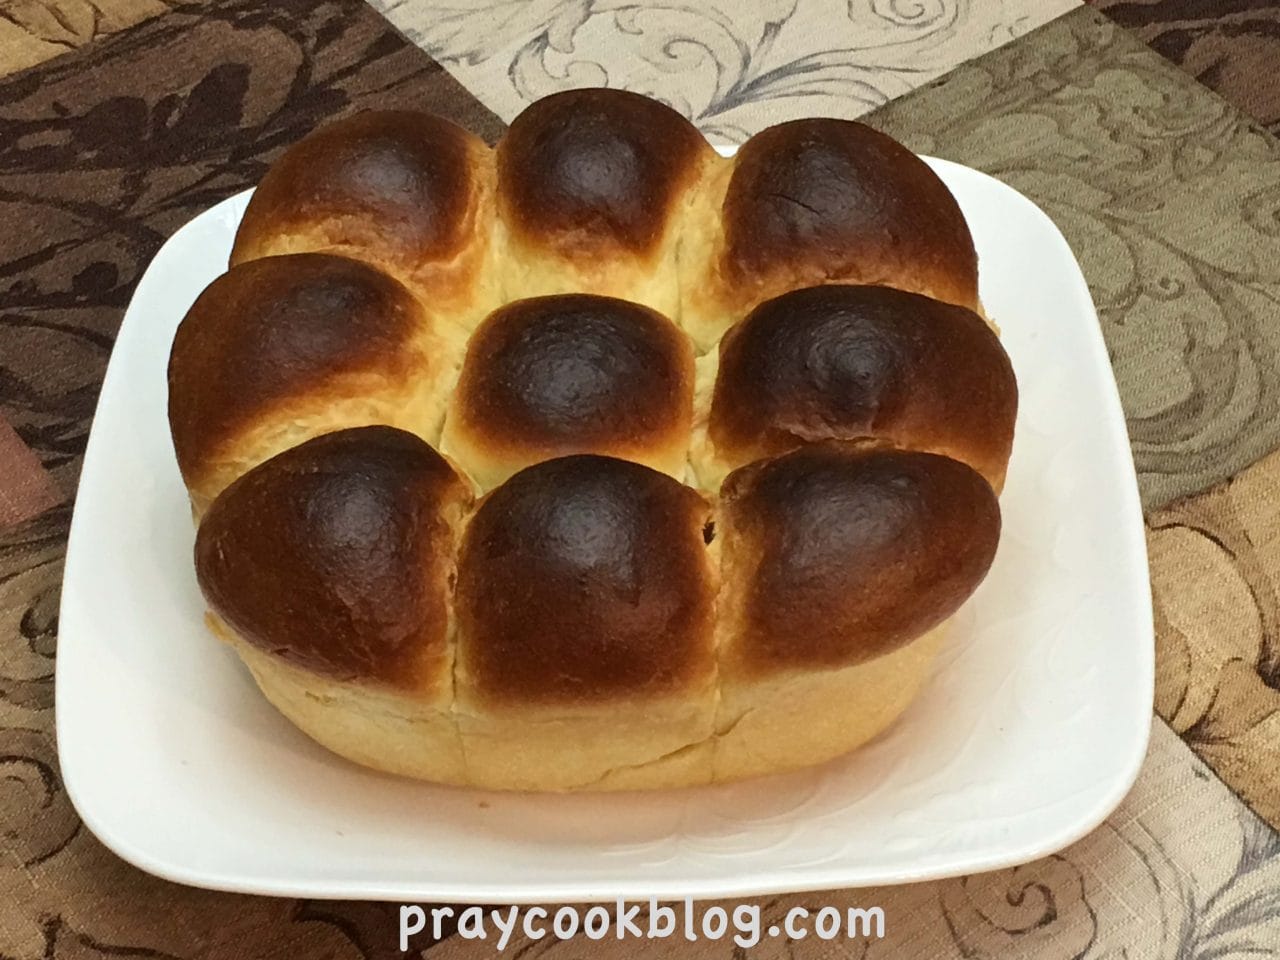
My oven was a little hot (and I wasn’t paying close enough attention) and so these rolls look a little over-browned. As it turns out they weren’t. My Chief Bread Eater and Sous-Chef Dish-washing mom flipped over Japanese Milk Bread.
Me? I am making it again this week. Enough said.
Happy Baking!
~Catherine

- ⅓ cup bread flour
- ½ cup whole milk
- 5 cups bread flour
- ½ cup sugar
- 4 teaspoons active dry yeast (2 packets)
- 2 teaspoons salt
- 2 eggs
- 1 cup warm whole milk, plus extra for brushing on the unbaked loaves
- 1 cup unsalted butter, cut into pieces and softened at room temperature
- For the starter: In a small heavy pot, whisk flour, milk and ½ cup water together until smooth. Bring to a simmer over medium-low heat and cook, stirring often, until thickened but still pourable, about 10 minutes (it will thicken more as it cools). When it’s ready, the spoon will leave tracks on the bottom of the pot. Scrape into a measuring cup and lightly cover the surface with plastic wrap. Set aside to cool to room temperature. (You will have about 1 cup starter and it will make 2 loaves)
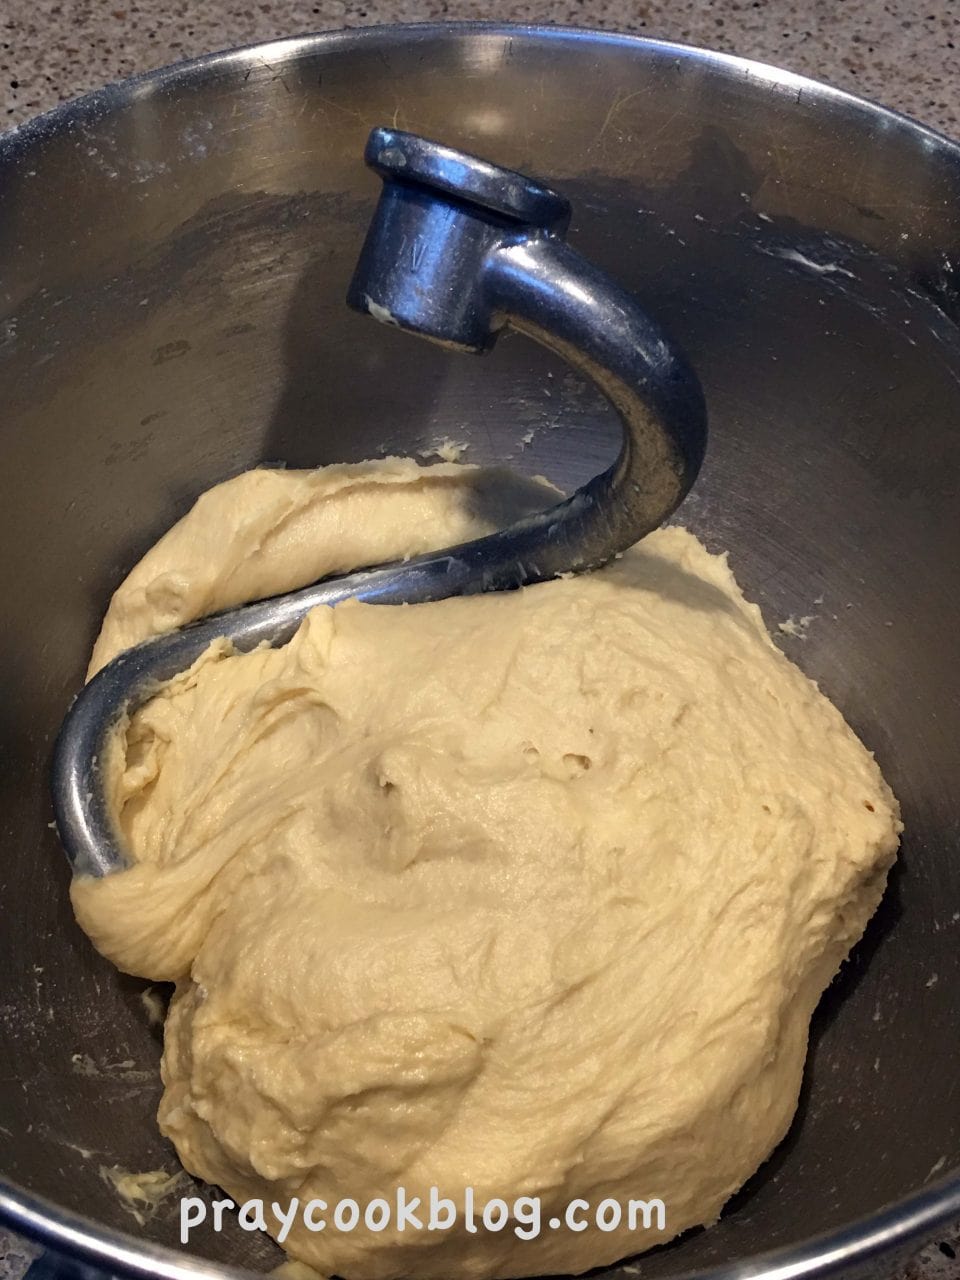
- Make the dough: In the bowl of a stand mixer fitted with a dough hook, combine the flour, sugar, yeast
and salt and mix for a few seconds, just until evenly combined. - Add egg, milk and the cooled starter. Turn the mixer on low speed and knead 5 minutes.
- Add soft butter and knead another 10 to 12 minutes (it will take a few minutes for butter to be incorporated), until the dough is smooth and springy and just a bit tacky.
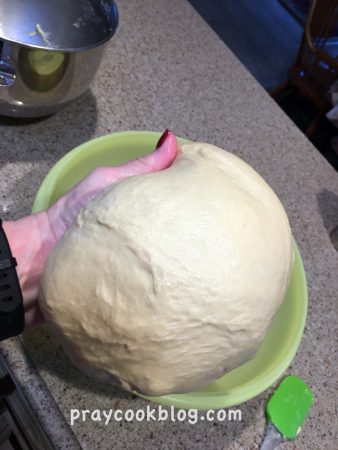
- Lightly butter the inside of a bowl. Use your hands to lift
dough out of mixer bowl, shape into a ball and place in prepared bowl. - Cover with a kitchen towel and let rise in a warm place until doubled in size, 40 to 60 minutes.
- Punch the dough down and use your hands to scoop it out onto a surface. Using a bench scraper or a large knife, cut dough in half. Lightly form each half into a ball, cover again and let rise 15 minutes.
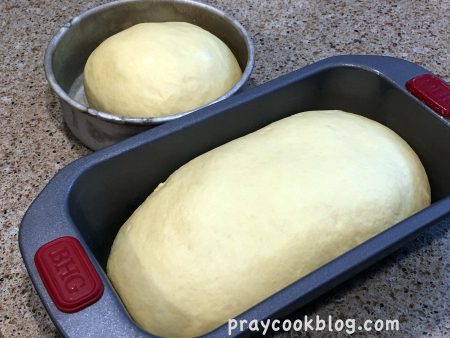
- Heat the oven to 350 degrees. In the meantime, generously butter two 9-by-5-inch loaf pans.
- Shape each half of the dough into a round - start by shaping your risen dough into a round. Let it rest for a few minutes after you do this to give the gluten a chance to relax. This will make shaping the loaf a lot easier.
- Flatten into a Rectangle - Use the heels of your hands to gently flatten the round into a rough rectangle. If the dough is sticking to the counter, sprinkle a little flour underneath. Try not to use too much flour, though, or else you'll have trouble getting the dough to stick to itself once you shape it.
- Fold the Bottom Third Up - This part is like folding a letter! Fold the bottom third of the dough over on itself.
- Fold the Top Third Down - Then fold the top of the dough down so that it overlaps the other layers.
- Pinch Closed - Use your fingers to pinch the dough closed where the top layer meets the bottom layers. Don't forget the sides!
- Fold the Dough Again - Our goal is to get the surface of the loaf as taut as possible. This will help the loaf rise evenly and keep its shape. If your loaf still seems a little loose after the initial folding, just fold it in half again and pinch it closed. We do this by pressing the middle down and drawing up the sides.
- Invert the Loaf into the Pan - Roll the loaf over until the seam is facing down and then gently lift the loaf into your pan. The seams should be on the bottom with the tight surface facing up.
- Let the Loaf Rise - The loaf is ready to bake when it starts to peak over the rim of the pan.
- Brush the top with milk and bake at 350 degrees F. on the bottom shelf of the oven until golden brown and the internal temperature reaches 190 degrees F. (check with
instant read thermometer) - Let cool in the pan 10 minutes, then remove to a wire rack and let cool at least 1 hour, to let the crust soften and keep the crumb lofty. (If cut too soon, the air bubbles trapped in the bread will deflate.)
https://cooking.nytimes.com/recipes/1016275-japanese-milk-bread
How to shape a loaf of bread:
https://www.thekitchn.com/basic-techniques-how-to-shape-97063
The bread looks scrumptious! I don’t make bread because I eat too much, the smell tantalizes me!!!
Love your new photo!