Walk Through The Bible In One Year
Week 19 reading plan 2 Chronicles through Nehemiah 7
Click on the colored link to read each day’s scripture.
Monday 2 Chronicles 30-32, Tues 2 Chronicles 33-36,
Wed Ezra 1-3, Thursday Ezra 4-7,
Friday Ezra 8-10,
Saturday Nehemiah 1-5,
Sunday Nehemiah 6-7
Blessings as you read!
Are you reading through the Bible with me this year? If you haven’t started yet today would be a great time to jump right in. If you are already reading then you will know the story is coming alive! Blessings for week 19!
June 4, 2011 – my first blog post at My Daily Bread Body and Soul. The recipe was Asian Salad and did not include any pictures 🙂 365 days later – 236 blog posts, 200+ recipes posted, a bazillion pictures, 536 comments, 100+ followers, and 15,028 page views. Oh, and a Facebook Fan Page with a growing number of “Likes”! Praying, cooking, photographing, blogging is such a big part of my day I can’t quite remember what I did with all my time before. Maybe it was all just the same — except for the blogging. The creativity, learning, and challenge this blog brings just fills my soul with peace and happiness. I am thankful when I receive comments on a blog post. I am thrilled when my family gets excited over breakfast, lunch, or dinner. I have lots of fun meeting kindred-spirit food bloggers through Foodbuzz and Tuesdays With Dorie. Wherever you fit in, I am so thankful you are here and joining me on my journey to share food — for the body and the soul. Blessings!
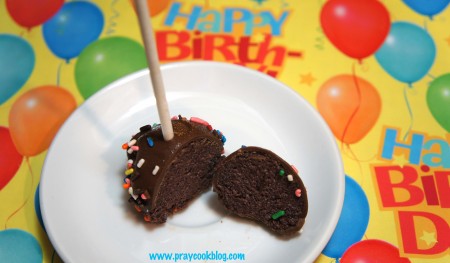
I am behind-the-times when it comes to “cake pops.” You may have already been making them but for me I recently heard about this fun activity from a friend. I have found there are entire websites with recipes, designs, baking equipment, “sticks” and much more just for CAKE POPS! This was my first go and mom and I had fun making them. As per usual with our first time adventures we learned some does and don’ts along the way. My recipe will include lessons learned!
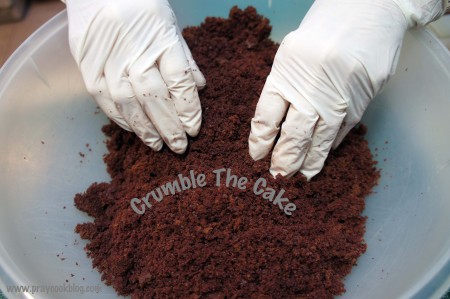
This part is fun 🙂
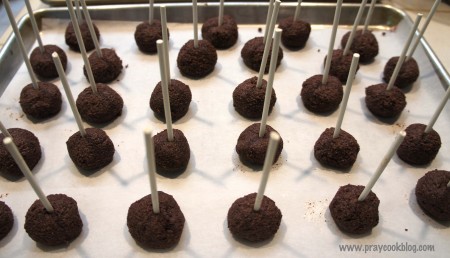
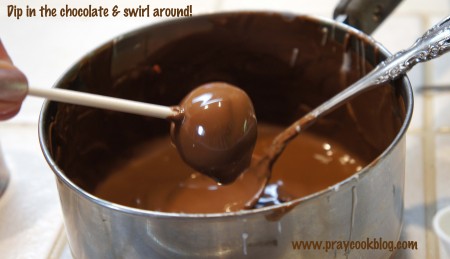
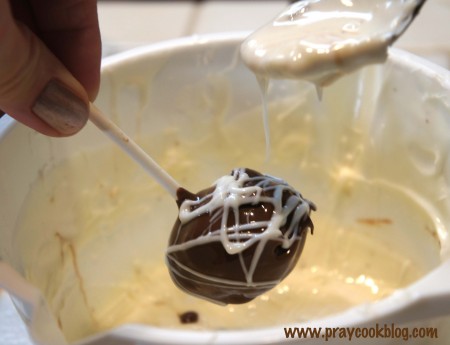
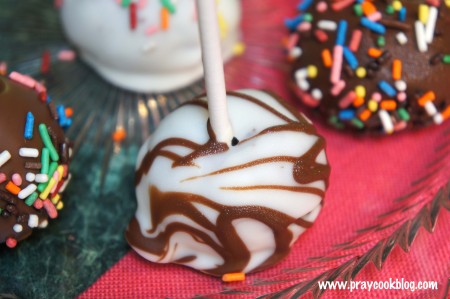
(1) Be sure and “glue” the sticks in place with melted candy coating.
(2) Store pops in a container at room temperature if you are serving that day.
(3) If serving the next day, just cover and place in the refrigerator, let come to room temp before serving (coating remains hardened.)
(4) Pops can be place in a container and frozen for up to two weeks.
Tomorrow is Tuesday’s With Dorie and we are making Oasis Nan! I hope you will join me for the next installment from the Baking With Julia cookbook.
Be sure and join me on Thursday as I am kicking off a birthday celebration giveaway! I hope you will come back for the details on how you can enter to win!
Happy a blessed week and happy cooking!
- 1 Favorite Cake Mix
- 1 Can of Frosting
- 48-60 Cookie sticks
- 1 Package Chocolate Almond Bark
- 1 Package White Almond Bark
- ½ cup Semisweet Chocolate Chips
- Bake cake mix according to package directions. Thoroughly cool then crumble in a large mixing bowl.
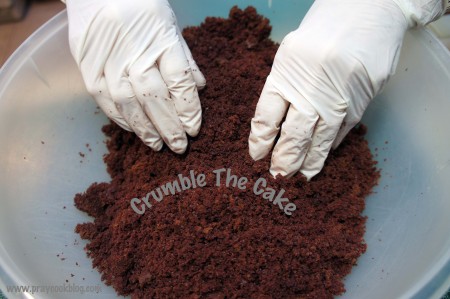
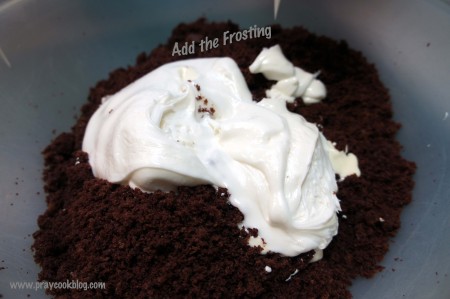
- Add ½ to 1 can of your favorite frosting to the crumbled cake mix. Start with ½ a can and add more if the cake doesn't stay together when made in a little ball. Choose a frosting that will blend well with the flavors of the cake. This will mix best by hand.

- Using a small to medium scoop dip into the cake/frosting mix. Roll the mixture in your palm into a nice uniform ball. Place on a parchment lined baking sheet.

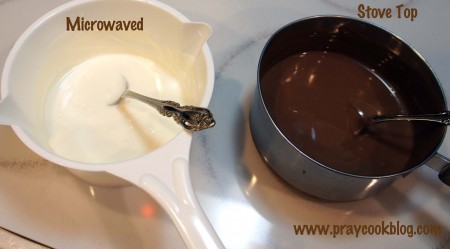
- Slowly melt 1 package of either the white or chocolate almond bark or candy melts according to package directions. I like to do this in the microwave because it is fast, but you have to be careful not to over-melt as they will burn and harden quickly. The bark or candy melts can also be melted on the stove top or using a double boiler. You will only use a bit of this to "glue" the stick to the cake ball.
- When candy is melted, Dip a stick about 1" into the candy melt. Then place it into the center of your cake ball. This will act as a glue keeping your cake pop and stick attached. Place on a baking sheet lined with parchment paper. Freeze for 1 to 2 hours to help solidify the cake and the stick.
- When ready to dip cake balls, melt both chocolate and white candy according to package directions. (Re-heat the candy used to glue the sticks in place.) * While melting ½ cup chocolate chips can be added to the chocolate bark for a deeper, richer flavor.

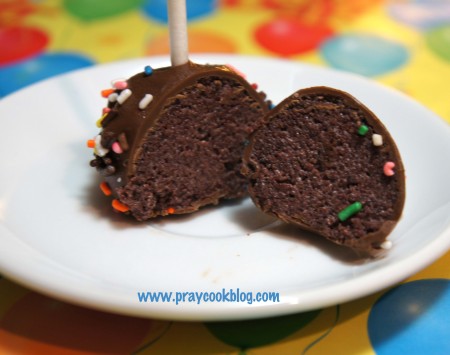
- Remove cake pops from freezer and gently swirl in the melted candy, allowing excess to drip back into bowl.

- Sprinkle with decorations or drizzle with opposite colored candy (white on chocolate or chocolate on white). Let your imagination run wild as you decorate!

- These cake pops can go back into the freezer until ready to use, or they can be left on the counter for use later that day, or refrigerated for use within a day or two.

Congrats on your blog’s 1st birthday. The cake pops look great. Like the tips you added. I also joined your Facebook page!
These look great! I haven’t tried cake pops yet, so you’re definitely not the last one on the boat there…they just seem so fussy. I really should bite the bullet and try them sometime, though.
Hi Jess, thanks for stopping by my blog. I will definitely make these again not just because they are so easy but especially because they are so fun to eat 🙂
Happy Birthday to you – Happy Birthday to you. I love the blog and have shared it with my family and friends. Have a great reunion!!
Thank you Cheryl, I think of you often when I am blogging, as if you are reading my words. Please stop back by on Wednesday … a giveaway is in store!
bakingismyzen commented on My Daily Bread Body and Soul:
Catherine,
Congrats on your blog’s 1st birthday. Time flies when you’re having fun!
The cake pops look great. Like the tips you added.
I joined your Facebook page today.
~Carmen
http://bakingismyzen.wordpress.com
Catherine,
Congrats on your blog’s 1st birthday. Time flies when you’re having fun!
The cake pops look great. Like the tips you added.
I joined your Facebook page today.
~Carmen
http://bakingismyzen.wordpress.com
Thanks for joining my Facebook page today and for stopping by my first bloggy birthday! I only wish I could really share a cake pop with you!